Let me start by saying there are quite a number of Duplo loco models. I discuss here only the ones I actually have experience with.
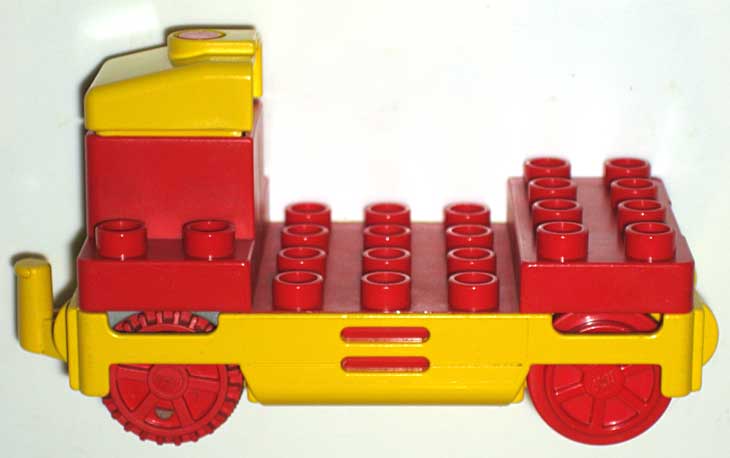
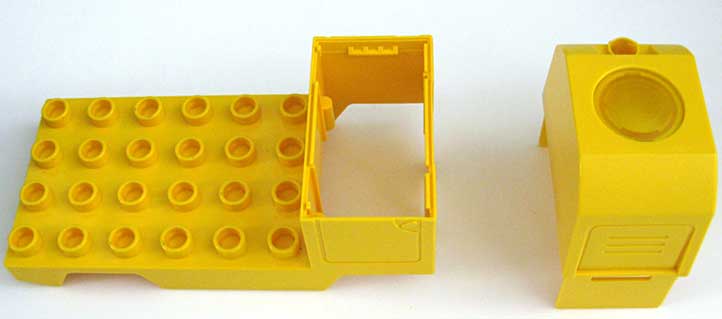
The Duplo locomotives have two main parts: the top, which is one colour (here red) and the bottom (here yellow). The top part also carries the on-off button, which is the same colour as the bottom.
an intelliloco still whole
Both parts click into each other, which means we will have to deal with these tabs with hooks that are meant never to be disassembled. There are two such tabs in the back and a wide one in the front.
To take the cover off a locomotive requires a special tool to un-click the tabs. A strong, thin steel blade would do, but it would still be a very dangerous job. You are hereby warned that opening the locomotive may be dangerous to you and to the locomotive: you may get hurt and you almost certainly will damage the locomotive. Please be extremely careful, prepare the workplace well, and apply force only as needed.
I use my workshop, where I have a workbench and an array of tools. Do not attempt this in an ad-hoc manner in the kitchen…
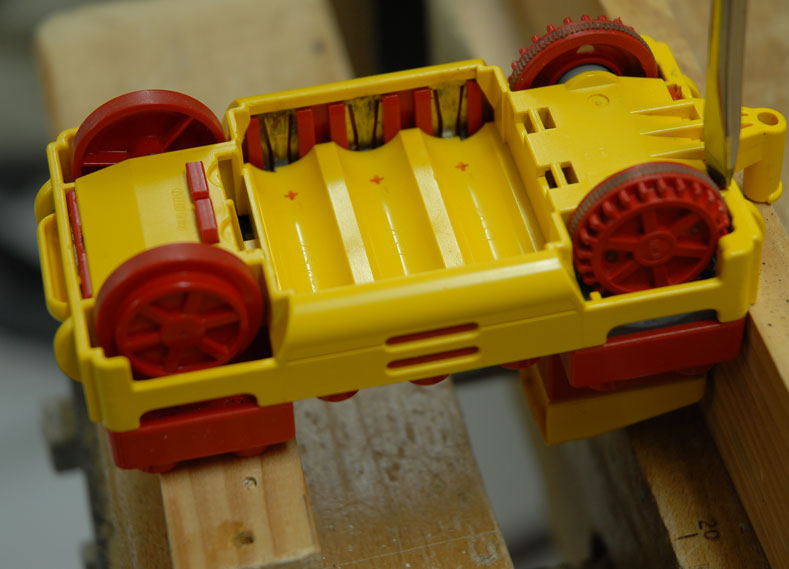
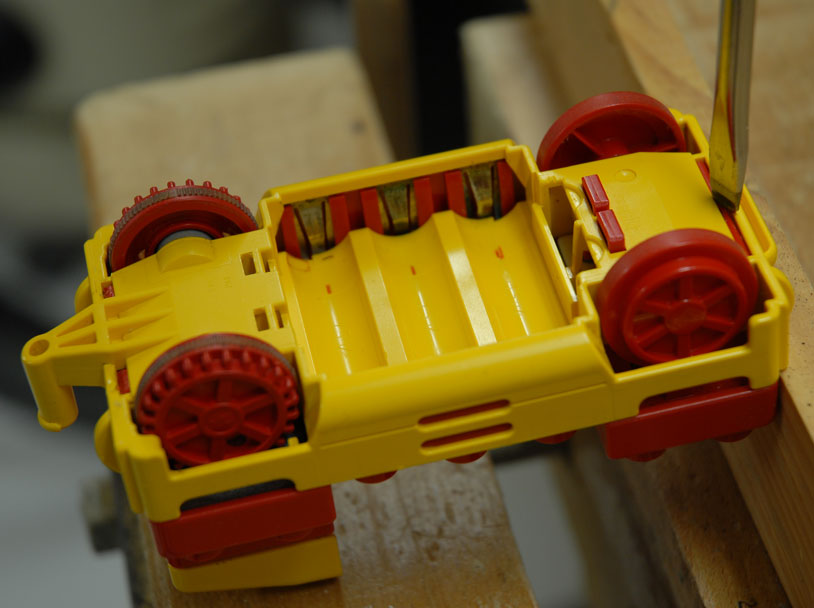
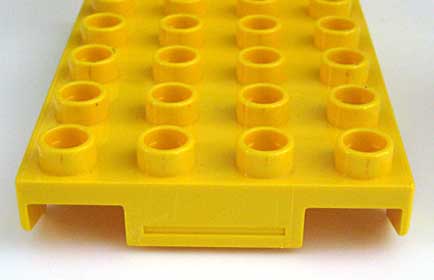
I open the front and back separately, starting with the front. First I prepare two planks, such that with the locomotive upside-down, it is nicely horizontal, resting on both planks. The side with the tab to be opened should be supported only with the bottom part, and the top part should be free to move down. Fix the plank in a vise if possible.
resting on the front of the bottom part
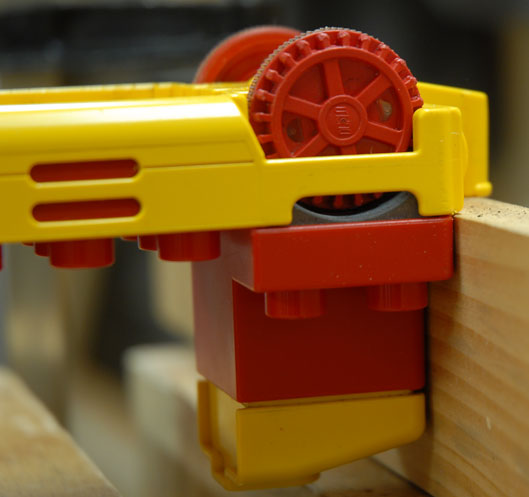
Then I use a screwdriver of the right size to tap the lips of the tabs:
Screwdriver in place for a back tab
If you have not got a screwdriver with a nice thick, flat end, then hold the screwdriver a little at an angle, so that it will not too easily slip off the tab:
Screwdriver in place for front tab
Gently tap on the screwdriver with a wooden or plastic hammer, or with a block of wood. It is very important that the locomotive is perfectly seated on the two planks that support it.
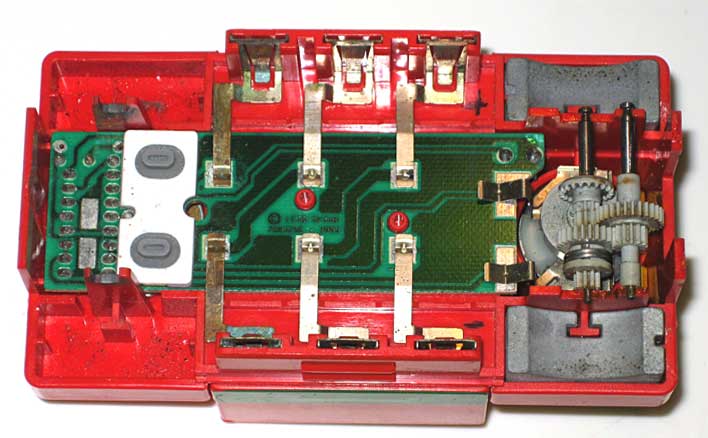
Once the cover is off you can see the works:
an intelliloco insidean intelliloco inside
There is not much you can do here, except perhaps remove dirt and maybe apply some light grease.
New Loco
As I discoverd on the EuroBricks forum there are two versions of this "new" loco: one has a detector to stop the motor in some circumstances (discussed below) and the newer version, outwardly identical, lacks this sensor.
The new locos are even more closed. Taking them apart is done in a similar way as above.
topfront tabback tab
There are no buttons under the new loco, it does not sense anything from the rails.
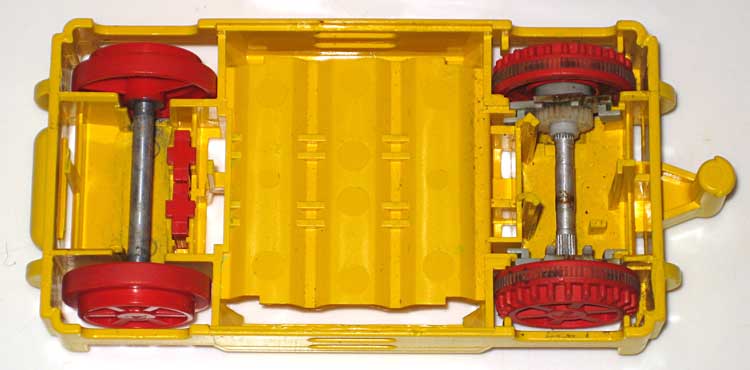
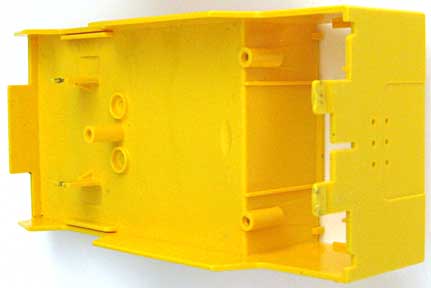
chassis
The Stop sensor
When the motor is running and the loco hits an obstacle, is picked up, or falls over, it stops within a few seconds. I had figured out that it sensed somehow that it was no longer moving. The obvious way to do this is by monitoring the rotation of the front wheels which are not driven. In normal operation these wheels turn as they are roll along the rails or the floor. But as soon as the locomotive stops moving these wheels stop too. Detecting the rotation should be done without any physical contact between the computer and the wheel's axles, both to avoid friction and to make sure dirt cannot interfere. The way to achieve that is to use a reed relay fixed to the chassis and a little magnet on the axle. To my great satisfaction that was exactly what I found:
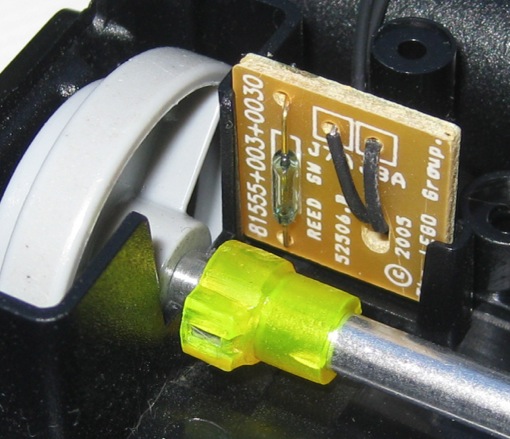
magnet of the stop sensor
The magnet is in the transparent yellow bit on the axle, the reed relay is the vertically positioned small glass cylinder with greenish ends. It is even marked "REED" on the circuit board. The relay has two tiny bits of magnetisable wire in it, that overlap but do not touch. When the magnet passes in front, it magnetises the wires, which then attract each other and close the contact. You can test that the stop sensor works that way by holding the loco in your hand, starting it, and spinning the front axle with your fingers. As long as you make the front axle spin, the motor will run.
Note again the flat, wide wheel rims and the thick axle, made to withstand quite some vertical load.