Where to get LiveCode
You can download the LiveCode Community system from LiveCode on its download page. That version is free and open source. You will have to register in order to get your copy activated.
en
You can download the LiveCode Community system from LiveCode on its download page. That version is free and open source. You will have to register in order to get your copy activated.
There are plenty of introductory tutorials with videos, so I will not repeat here the material they cover. What you find on this page is a summary of the basics needed to get around in the LiveCode system so that you can build your application without getting terribly lost.
There is no way you can understand this page on a first reading. Learning to build programs is an iterative process: like cooking, you have to try again and again before you understand the world of writing programs.
So do not hesitate to come back to this page several times!
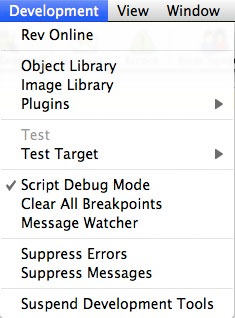
Here is a view of what you will normally see while you are constructing a LiveCode program:
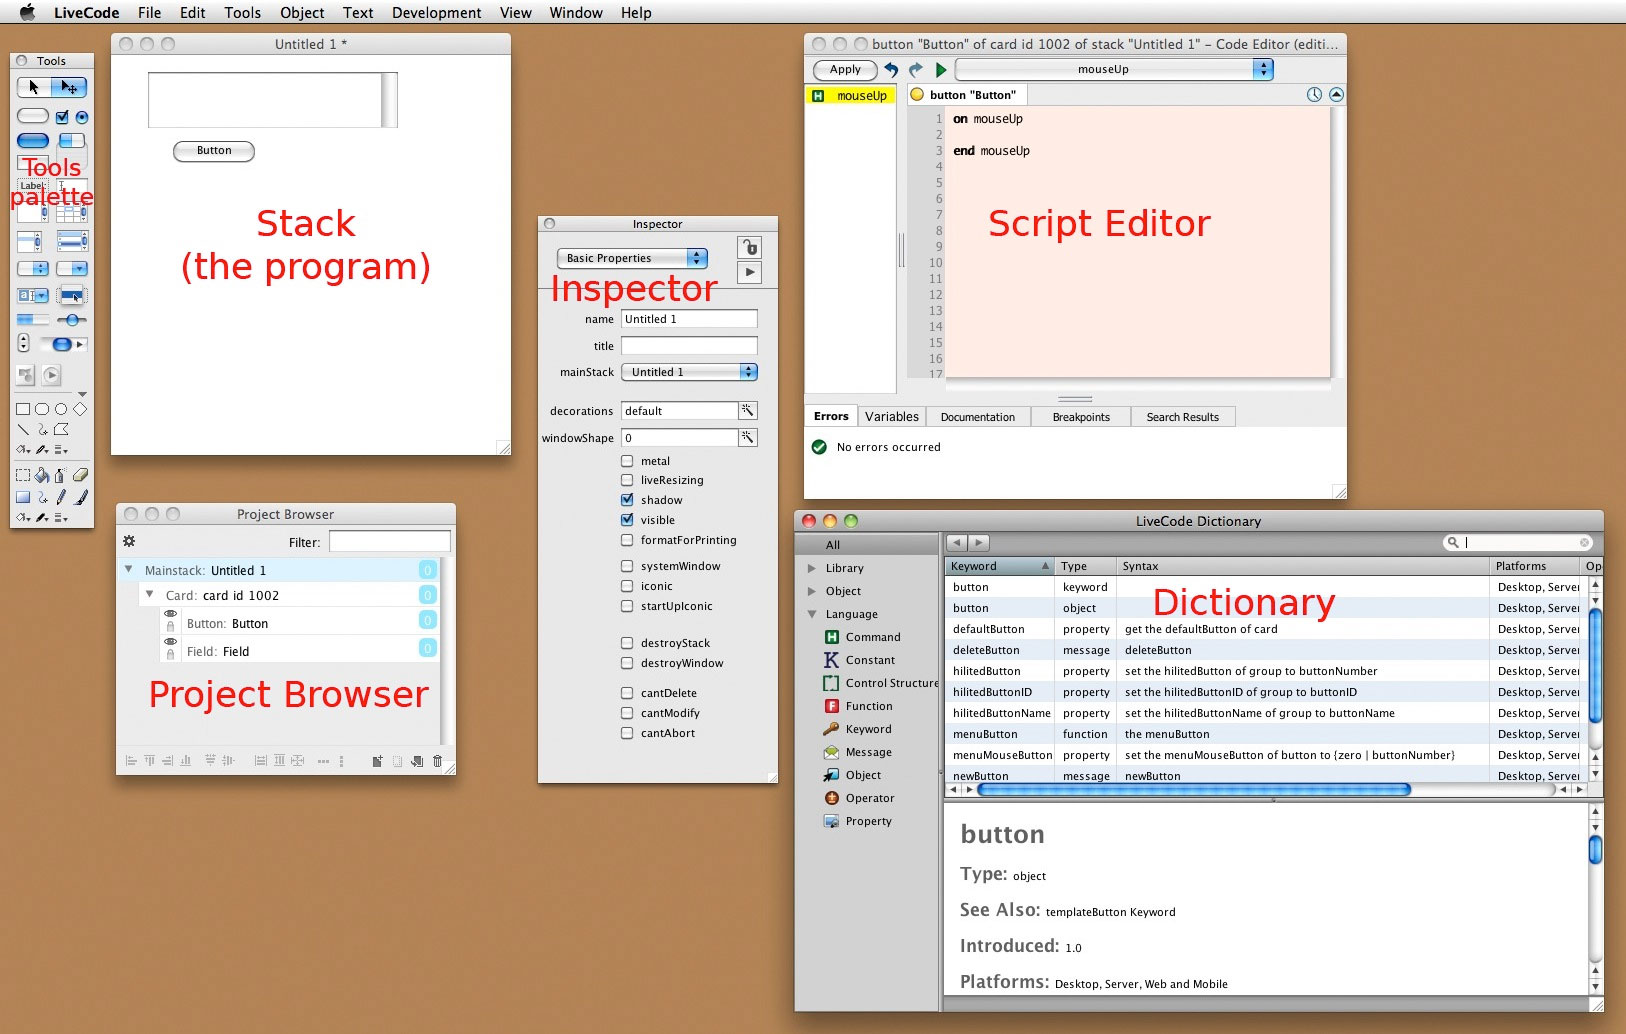
The function of these elements is explained below, as well as how to make them appear or hide them.
Think of how you make a letter using a word processor: you launch the word processor, create a new document which displays in a new window, type the elements of your text, and give them certain properties such as styles, using an inspector palette. You add objects like tables and images by using menus or palettes. You save your work in a file on your computer, among your documents.
With LiveCode you make an application in a similar way: the application appears in a window, the objects of your program are inserted via a palette. You save your application to a file among your documents.
I will use the words application, program, app and stack as synonyms of each other.
This section is independent of LiveCode: all programs today have the characteristics discussed here.
Consider programs or aps you are familiar with. They present:
Windows: rectangles on the screen that hold the other objects.
Buttons: objects you can click on with the mouse (or tap with your finger on touch panel devices).
Fields: areas where you can type text.
Graphics: to help you understand the purpose of the program.
Scrollbars: to let you deal with large amounts of data on a small screen.
Menus: to choose actions or modes.
Various other interface elements such as sliders, check boxes, radio buttons, progress bars may also be present.
Programs do things when events happen. Examples of events are: clicking on a button, scrolling a text field, typing a letter, selecting an item from a menu, moving the mouse around, and so on.
Events cause a message to be sent to an object.
Each event is the origin of a message, which is directed to an object. For example, when you click a button with the mouse, you first move the mouse onto the button, then you push the mouse down and finally you release it.
There are three events here, and three messages are sent to the button:
The button object that receives the messages may choose to respond to them or not. That depends on the object's script.
A script is a text that defines the behaviour of an object. Without scripts objects are inactive.
A handler is a piece of a script, it specifies what to do when a particular message is sent to the object. A handler handles the message.
For example, the button we discussed above could have a script, and in its script three different handlers: one for each of the three messages that we mentioned. It could also just have a handler for the MouseUp message only and ignore the other two.
LiveCode is the factory with which you are going to produce programs. LiveCode itself is an application. But its products are programs, and the programs it produces as stand-alone applications are just like any other application on your computer.
Using LiveCode means these things:
After launching LiveCode you should see these elements:
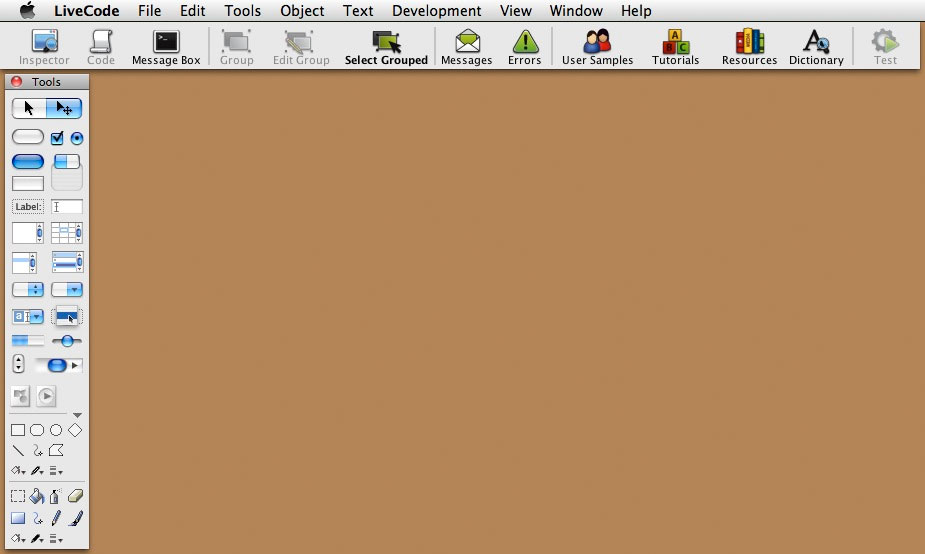
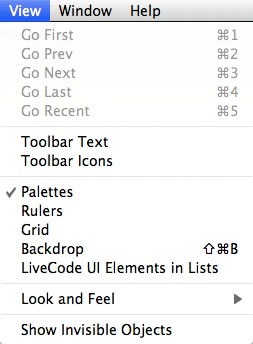
There is a menu bar with the usual File Edit and Help menus, a horizontal tool strip and a palette.
In the beginner's examples I will generally not use the tool strip. You may gain space by hiding it: uncheck Toolbar Text and Toolbar Icons in the View menu.
The tools palette is important: it shows all types of objects you can use to build your application.
Certain items of the menus are important:
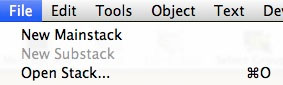
A basic LiveCode program is a stack of cards. You make a new program by choosing New Mainstack from the File menu.
There will be a single card in that stack. For now, and in many of the beginner's programs, I will not use more than one card.
Then you drag objects from the Tools palette onto the stack window: there are text fields, buttons, scrollbars, vector graphics and images.
They are all deposited onto the first card of your stack:
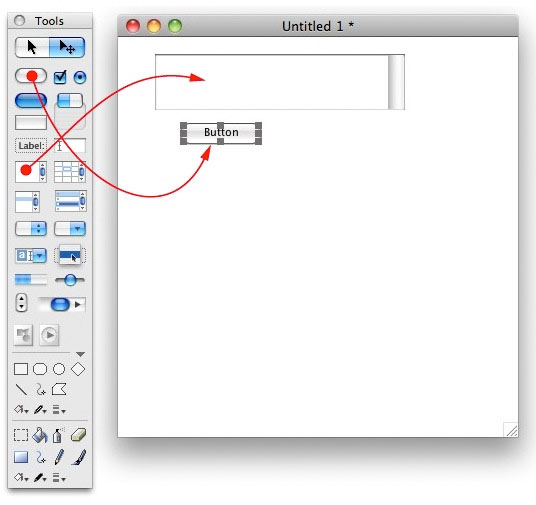
Each object gets handles: they are the small squares at each corner and in the middle of each side. You drag these to resize the object.
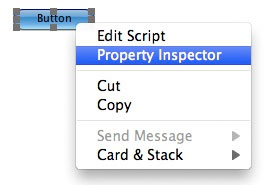
Right-clicking on an object pops up a menu in which you can select the object inspector:
|
|
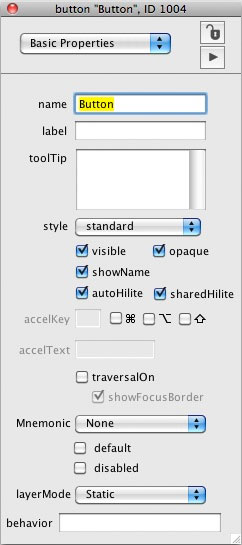
The inspector allows you to give a name to your object, set various properties such as colour and adjust the behaviour. There is an entire pop-up menu under the words Basic Properties:
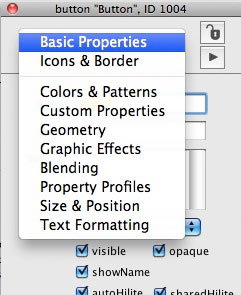
Don't hesitate to select other views of the inspector, and explore what properties you can change there.
If you have opened the Project Browser and made a new stack with a field and a button as in the example above, then the Project Browser will look like this: (provided you have clicked all the little triangles so they show what is inside the various objects)
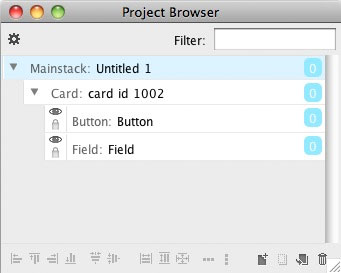
The Project Browser shows all objects you have created, with their names and also how they relate to each other. The relationships form what is called a tree structure: the stack is the root, it has one card (a branch), which has one field and one button (two twigs on the same branch).
There are little blue squares at the right. They tell you how many lines of script each object has. In the figure all show a zero.
Clicking on one of the blue squares opens the script editor:
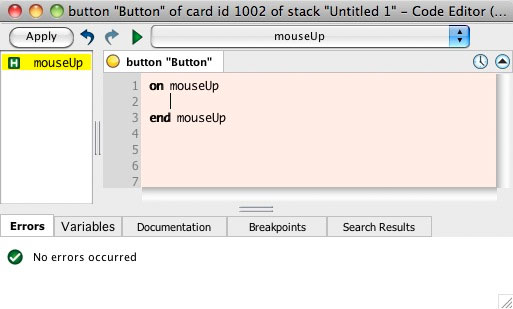
I clicked on the blue square after the button object, and in the image above the editor shows the script of the button in a tab. It has also already filled in the most common handler for a button: the MouseUp handler. I will not go into writing scripts here, that is done in the examples. Having the script editor open is useful.
Well, and that's essentially it. It's up to you now to try on your own, and maybe start by reproducing some of the annotated examples.